
As I'm still slightly obsessed with Chinese food and ingredients and I had the chance to deliver some baking presents to a friend in China via another friend who was travelling home, I decided to make these cute panda macarons, made with black sesame seeds instead of ground almonds.
I'd seen a few recipes around that replaced the almonds with these interesting, dark and flavoursome Eastern seeds, so I was pretty confident that it would work. Some recipes, such as this one from The Tart Tart, also added black food colouring, but I liked the speckly grey appearance, and I thought it would work well as a background for the panda design.
I originally was inspired to do the panda macaron design from Ochikeron, a girl from Japan who runs a cute and popular YouTube cooking account. I have to tell you, at first I was shocked at her brazen technique for making macarons - imagine, knocking all the air out that you just spent all that time whisking in! And insisting that it was a necessary step, which would yield even better results, the longer you kept going! I had to try this for myself to see if this would really work. And after years of cracked macarons, which I was always told was due to overmixing, hence I tried to mix as little as possible, I was willing to try anything new. Now, finally, it seems, my problem was fixed - in trying to avoid overmixing it, I was undermixing the ingredients, which had really caused the cracking. It seems like once the initial careful folds are over, you can afford to be a bit more rough with your macaron batter than I thought. The batter was a bit more runny than usual, so I had to pipe a bit less into each circle. But the results were amazing. All crack-free. So I'm definitely doing this again.
Ingredients:
Macaron shells:
55 g egg whites (I used 2 egg whites and this seemed to be enough)
50 g caster sugar
60 g black sesame seeds, finely ground using a coffee grinder (you can always use regular ground almonds here, to make the traditional macarons)
80 g icing sugar
Decorations:
Decorations:
~ 80 g dark or milk chocolate (depending on taste)
20 g white chocolate
(I used a few buttons of pink candy melts as well to do the pink cheeks, but you can tint your white chocolate pink with gel food paste food colouring as well).
Optional filling:
150 g white chocolate
150 ml double cream
Optional filling:
150 g white chocolate
150 ml double cream
Method:
1. Draw about 1 1/2 to 2 inch circles on a piece of paper to create a template that you can slip under your baking parchment (you can draw around a small round cookie cutter). Alternatively, draw circles with a pencil on the reverse side of your parchment (don't let the food touch the pencil lead side!)
2. If your sesame seeds are not already ground up, grind them using a coffee grinder. This takes a few minutes to get them really fine, and you have to keep stopping to scoop down the sides. You want to make sure that the seeds are really finely ground in order to avoid big lumps in this recipe. It can also help to grind the seeds with the icing sugar, in order to help stop it becoming sticky.
3. Sift the icing sugar and ground sesame seeds (if you can) into a bowl.
4. Measure the egg whites in a large bowl, and whisk using an electric hand-held of stand-mixer until it reaches soft peaks. Then gradually add the caster sugar, one third at a time, and continue to beat until stiff and glossy. You can tell when the meringue is ready when it has very stiff peaks, and you can pinch a little piece between your fingers and you can't feel the graininess of the sugar any more, because it is all dissolved.
5. Carefully fold the meringue into the dry ingredients and mix until just incorporated.
6. Now comes the tricky part! Beat the batter down through the middle and then scrape and wipe along the sides. If you're not sure how to do this, check out Ochikeron's video. I was really surprised at how tough you have to be! But this is a really great opportunity to eliminate any lumps from the black sesame seeds, which can be quite sticky after grinding. Repeat the macaronnage movement ten or more times. They say that macaron mix should take no more than 50 turns, and this number turns out to be about right for me!
7. Fill a piping bag with the batter and fit it with a 3/8 size round tip. Pipe out the batter in the circles. This batter seems to be more runny than regular batter, so pipe slowly and slightly less than you normally would and see how far the batter spreads out before moving on. Tap the baking trays on the counter, to bring any bubbles to the surface.
8. Preheat the oven to 150 C (320 F), while you leave the macarons to dry out for about 30 minutes (or more if the conditions are more moist where you are). You can test if they are fully dried by gently touching them with a clean, dry finger. The batter should not stick to your finger when you touch it.
 |
| Leaving the piped macaron batter to dry |
9. Once dry, bake for about 15 minutes. Do not open the oven door during the first ten minutes! Following baking, allow to dry and cool completely on a tray before attempting to remove them from the baking parchment.
To decorate:
1. Melt the dark chocolate, and temper it. I know that it's long winded and fussy, but trust me, it helps you save more time in the long run, as it helps the chocolate to set much more quickly, so you don't have to wait ages or to refrigerate the macarons in between the steps. Place the melted chocolate into a small piping bag and cut off the end or place a thin round tip at the end. The smaller the better, because this is a very delicate and fiddly piece of art you are about to pipe onto the shells! Also, the chocolate has a tendency to ooze and spread a little while it's melted and at the correct temperature. Once your chocolate is ready, pipe the ears, eyes, nose and mouth of the panda onto half your macaron shells. I also used the remainder of the melted chocolate as the filling to sandwich the two macaron sides together, because mine were going on a very long journey on an airplane, and I didn't know what conditions they would be kept in! So I didn't want any filling with butter or cream inside, which might melt or go bad. However, I would recommend a simple chocolate ganache filling for something like these, if you were giving them in person to a friend or serving at a party (see end of blog post).
2. While the first bit of chocolate is setting, temper the white chocolate. Carefully pipe the pupils to the panda faces.
3. Tint the remainder of the white chocolate pink (or melt the pink candy melts instead, if using) and pipe the rosy cheeks of the pandas. Allow all the chocolates to set at room temperature. When working with chocolate piping, I like to pipe over a wire rack with a sheet below it to catch any drips, and avoid making your whole work surface messy:
 |
| Piping on a wire rack, before adding the white pupils |
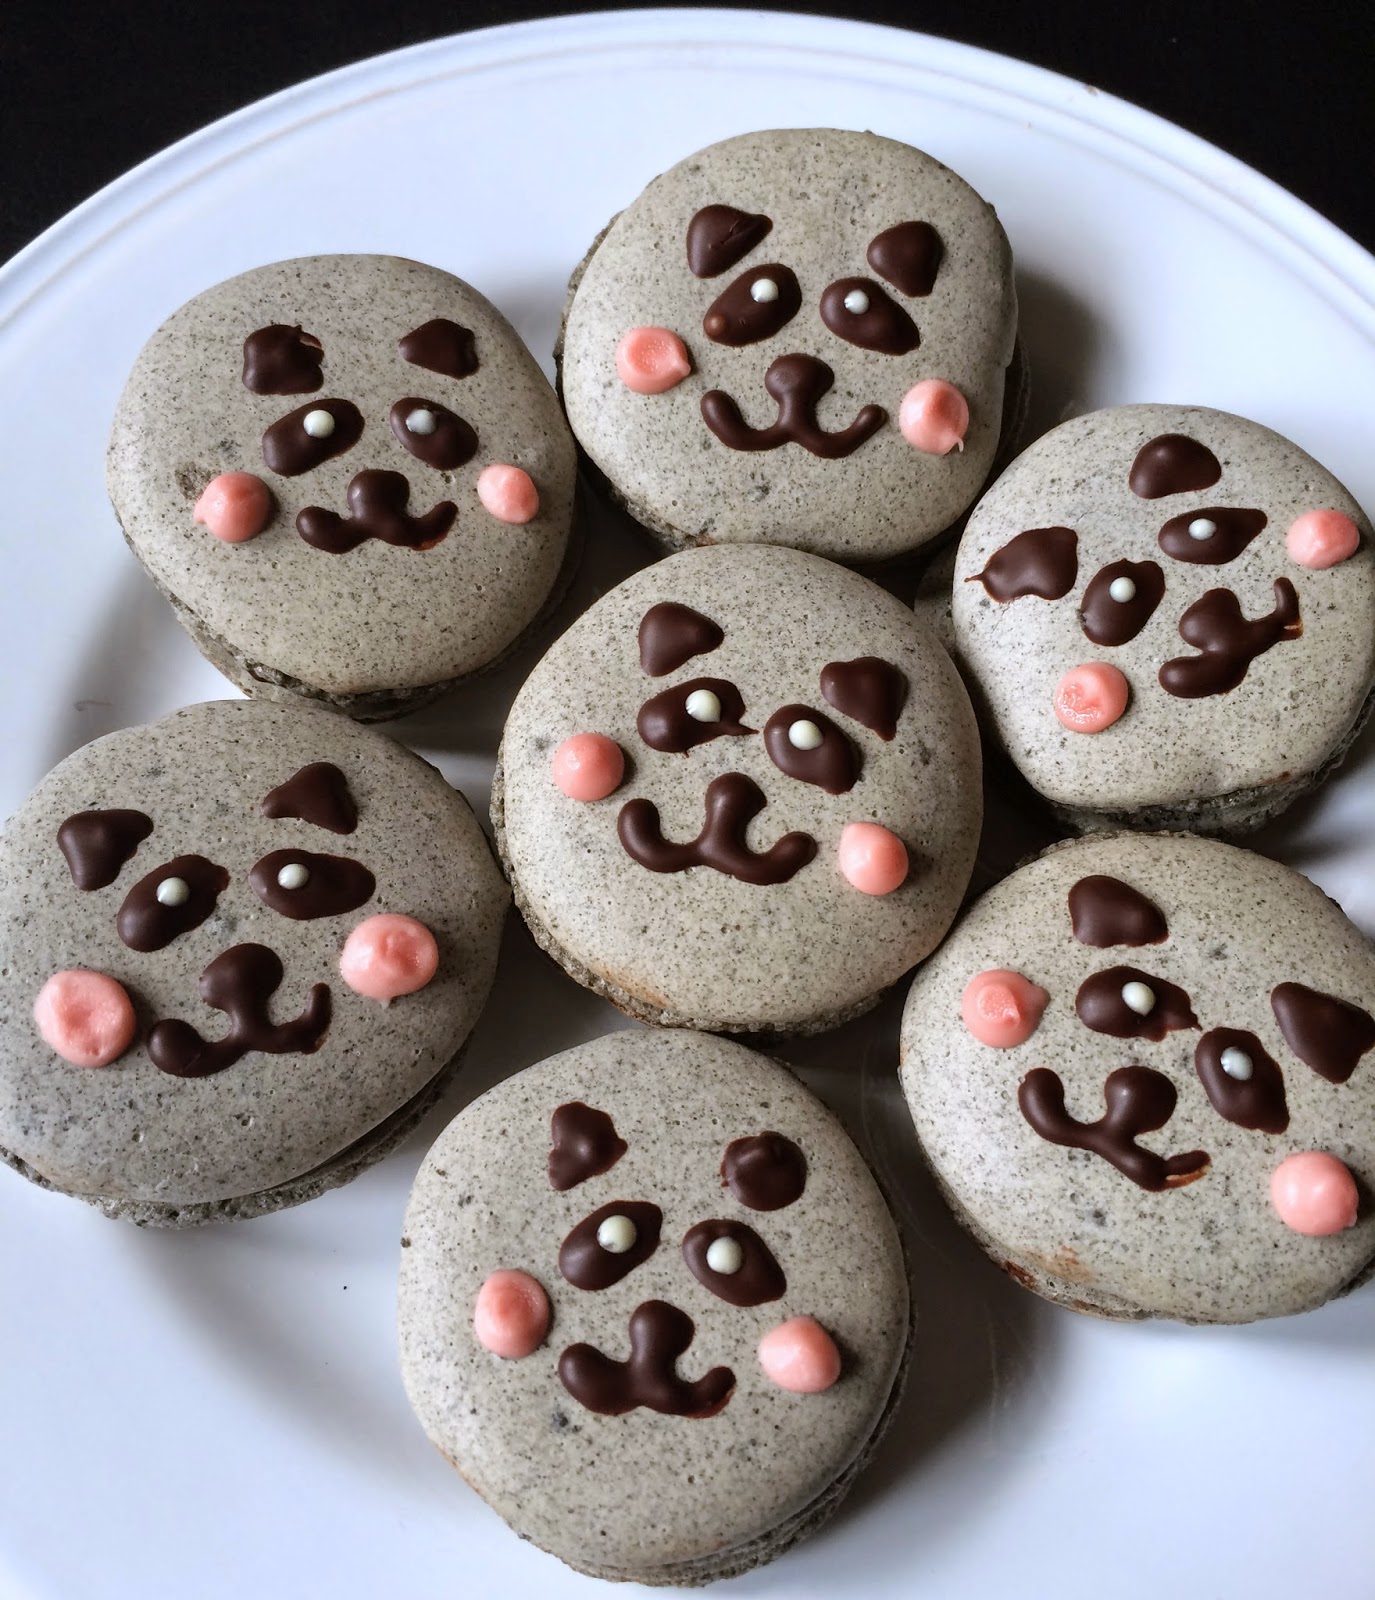 |
| The finished product |
Filling:
If you would prefer to have a creamy filling, my go-to recipe is whipped chocolate ganache. It is rich and creamy, but not as overpoweringly sweet as buttercream
1. Heat up the double cream by giving it a 30 s blast in the microwave (it should be slightly warmer than body temperature, but not boiling/bubbling).
2. Break up the chocolate into pieces, and then add to the warm cream.
3. Stir and repeat with 15 - 30 second blasts in the microwave until all the chocolate is melted.
4. Allow to cool and set in the fridge for about 1 - 2 hours.
5. After it is sufficiently cooled, use a hand mixer to whip it up as you would double cream.
6. Pop into a piping bag to make it easier, neater and cleaner to fill in the macarons!
I then boxed them up and gave to my friend to take with him on the plane. They did make it all the way to my friend in China, but they were a little worse for wear!

Oh well, hope they still tasted good!
No comments:
Post a Comment
What do you think of this recipe?