I've been slightly obsessed with ammonites since a recent trip to Lyme Regis on the Jurassic Coast had reignited my love of fossils! Combined with my love of fudge, this made for a brilliant gift idea!
Since my discovery that one of my childhood favourites, fudge, is a doddle to make, I have gone slightly crazy and have expanded to several recipes that I'd like to share with you here. I've talked previously in several posts about the wonders of a digital laser thermometer (for tempering chocolate, making hot sugar syrup for nougat and generally under my FAQ), but I'll say it again, it's definitely worth investing in one! No more candy thermometers caked in semi-candy goo, scales rubbing off over a long time, or trying to read something that's half submerged in an unpredictable liquid while it's veiled behind steam and/or smoke. Laser thermometers give you instant readings of the actual temperature without any of the fuss or mess. Fudge is a prime example of its use, as making it is sticky and messy, but it can go wrong if you're a few degrees over or under. Go over and you end up with toffee; under, and you get a sticky caramel sauce which doesn't set (this is not always a bad thing though).
I knew I wanted to make something ammonite shaped, and I searched everywhere for a good mould. However, there just weren't any, so I decided to make my own. If you'd like to get one for yourself too, click here. You can make your own too, using some of the fantastic products on offer from Make Your Own Mould. I used Silicone Plastique, which is an easy to use clay-like product, where all you do is mix two different putties together and then it is workable for up to ten minutes, which is great for getting it into all the little grooves of an ammonite. The original company is based in America, but the UK supplier I use is this one.
Now, getting back to the recipe. First, I will write the basic fudge recipe, and then below I will explain the details for how to get the three flavours.
I don't know about you, but I can't stand those "cheat" refrigerated fudges, that involve no cooking and always some kind of condensed or evaporated milk. I can understand that they are convenient for people without thermometers, who can't be bothered with the heating of the syrup. I guess that's alright for some, but they always feel to soft and clammy to me, and not worth the short cut. Making a good old fashioned crumbly fudge takes nearly the same amount of time, and just a bit more beating, and you get fantastic results that are simply on another level. The internet is awash with "cheat" recipes, so if you haven't tried this method of fudge making before, grab your thermometer and give it a try! I promise once you've tasted this fudge, you won't look back.
I got the recipe from the BBC Good Food website's "Vintage Vanilla Fudge" recipe, and here is the original ingredients list (although I normally make half or a quarter of this):
Once you have mastered this basic recipe, you can easily transform your fudge into alternative flavours:
 |
| Three different flavours of fudge - lemon and Limoncello, Baileys and white chocolate and dark chocolate and chili |
I knew I wanted to make something ammonite shaped, and I searched everywhere for a good mould. However, there just weren't any, so I decided to make my own. If you'd like to get one for yourself too, click here. You can make your own too, using some of the fantastic products on offer from Make Your Own Mould. I used Silicone Plastique, which is an easy to use clay-like product, where all you do is mix two different putties together and then it is workable for up to ten minutes, which is great for getting it into all the little grooves of an ammonite. The original company is based in America, but the UK supplier I use is this one.
 |
| The original fossil, silicone mould and the old fashioned crumbly fudge version! |
Now, getting back to the recipe. First, I will write the basic fudge recipe, and then below I will explain the details for how to get the three flavours.
I don't know about you, but I can't stand those "cheat" refrigerated fudges, that involve no cooking and always some kind of condensed or evaporated milk. I can understand that they are convenient for people without thermometers, who can't be bothered with the heating of the syrup. I guess that's alright for some, but they always feel to soft and clammy to me, and not worth the short cut. Making a good old fashioned crumbly fudge takes nearly the same amount of time, and just a bit more beating, and you get fantastic results that are simply on another level. The internet is awash with "cheat" recipes, so if you haven't tried this method of fudge making before, grab your thermometer and give it a try! I promise once you've tasted this fudge, you won't look back.
I got the recipe from the BBC Good Food website's "Vintage Vanilla Fudge" recipe, and here is the original ingredients list (although I normally make half or a quarter of this):
Ingredients:
450g golden caster sugar
400g double cream
50g butter
1 tbsp glucose syrup
1 tbsp vanilla bean paste
Pinch of salt
Basic method:
1. Line or grease your chosen receptacle with baking parchment or a little butter (I personally like to tip the fudge out just onto a silicone mat, because the fudge normally turns out quite firm). Tip the sugar, cream, butter, salt and glucose syrup into a large saucepan. The fudge mixture bubbles up quite high, and having a large saucepan means that it heats up more evenly, avoiding burning at the bottom while the top is not quite at the right temperature. Heat on medium high to dissolve the sugar and melt the butter, stirring now and again.
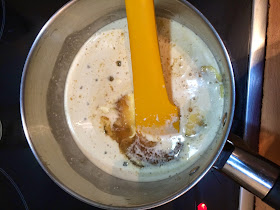

2. Once dissolved, lower to a medium heat, and put a sugar thermometer in the pan, making sure the end is completely covered by the syrup – if not, transfer the mixture to a smaller pan (with enough space for the syrup to bubble up). Alternatively, continue with the following steps, and check the temperature of the syrup every few minutes with a laser thermometer after the mixture starts bubbling. Increase the heat and bring the syrup to a steady boil. It will boil up quite high up in the pan like below:
Keep bubbling, stirring occasionally to stop the sugar from catching, until the mixture reaches 116 C (240 F) – this is known as the soft ball stage. This normally takes about 5 to 10 minutes, but varies on the temperature and ingredients that you use, so it's best to just keep watching it, because it can go over the correct temperature and start to caramelise really quickly! If you don't have any thermometer at all, you can also plop small blobs of the syrup into a bowl of cold water. The soft-ball stage is reached when the mixture stays together in the water, but when you take it out, it's still malleable between you fingers and you can shape it to different shapes.
 |
| Checking the temperature of the boiling syrup with a laser thermometer |
3. Remove the pan from the heat and leave to sit, undisturbed, for 5 mins, until the temperature drops to 110 C (230 F) or below.
I occasionally put the pan into cold water to stop the heating process, but don't leave the pan in there, move to a room temperature location to allow the fudge to cool naturally. This helps with the crystallisation process. Don't stir it before 110 C (230 F) is reached, because then you won't get the nice, small sugar crystals. Stir in the vanilla and a good pinch of salt.
 |
| After reaching 116 C (240 F), leave to cool for a few moments and allow the bubbles to subside, then start to beat (mix vigorously) |
4. Keep the sugar thermometer in the pan (if using) and begin beating the mixture with a wooden spoon, quite vigorously, until the temperature cools to about 60 C (140 F). If using the laser thermometer, check the temperature every few minutes, but the cooling time will take about five minutes, and you will know when the fudge has reached the correct temperature because it will suddenly become really thick and will have lost it glossy shine. Remove the candy thermometer if using, and continue beating for a few mins more. This process is very important when making fudge, as it creates small sugar crystals, which give the fudge its lovely smooth and creamy texture.
 |
| The fudge is done when it is grainy, lost its shine, and starts to come together in a ball like this |
5. Before it sets completely, quickly spoon the fudge into your prepared receptacle or press into your mould and smooth over the surface with your wooden spoon or spatula. Leave to cool at room temperature for a minimum of 1 hour to overnight – don’t put the fudge in the fridge as it will become sticky and won’t set properly. Once the fudge is cooled throughout the mould, you can check it by testing the back of the fudge. Gently pop out the fudge from the mould, or cut into squares. The fudge will keep, in a sealed container, for up to 2 months.
Once you have mastered this basic recipe, you can easily transform your fudge into alternative flavours:
Lemon and Limoncello Fudge:
Swap the unrefined sugar for refined, white caster sugar
Lemon rind from a juiced lemon
Replace 2 tablespoons of the cream with limoncello (optional)
1) Don't use unrefined sugar if making lemon-flavoured foods. The brown colour will make it look like your dish has gone off, and also, the unrefined sugars tend to have a more caramel flavour, and also caramelise quicker, which clashes with the lemon taste
2) For the lemon flavour, this is a great way to use up old lemon skins after juicing them. Simply slice up the lemon rind or roughly chop into large enough pieces that can be later scooped out of the syrup, and add at the beginning with all the rest of the ingredients as above
3) Replace two tablespoons of the cream with limoncello (if using), prior to boiling. The alcohol will be evaporated off during the cooking process, but the flavour will remain. Don't be tempted to add any alcohol after the cooking process, because the texture will be too soft and will not set properly
4) Start cooking the fudge as before, but then, at about 95 C, scoop out the lemon rind before the mixture reaches 100 C. This is because the rind turns very bitter once it reaches above boiling point, and then your fudge will suddenly become revolting and no one will want to eat it!
5) Proceed with the rest of the recipe above, as described
This method works well with subtle, light flavours that don't blend well with caramel flavours, such as floral or berry flavours
Baileys and White Chocolate Fudge:
Replace a third of the cream with Baileys
100 white chocolate
1) First, chop up the white chocolate into small pieces so that when you add it to the hot fudge, it melts quickly. To get the best results, you could even grate it with a large-hole grater
2) After heating the fudge, and letting it cool to 110, start to beat. When the fudge reaches about 80 degrees, add the chocolate, and keep stirring. Don't add the chocolate earlier, because it could burn or separate. The temperature will drop rapidly when you add the chocolate, so be careful that you don't add it to late, or the fudge will start to set before its fully incorporated.
3) Follow the other steps as outlined above
Chocolate and Chili Fudge:
60 g cocoa powder
1 or 2 drops hot sauce
pinch of cinnamon
pinch of nutmeg
100 g milk chocolate
100 g milk chocolate
1) Sift the cocoa powder, and then mix in with all the other ingredients, except the chocolate, in the pan and heat (add one or two drops chili sauce, depending on whether you prefer a subtle or strong heat)
3) You have to keep stirring this one every now and then during cooking, as it has a tendency to catch on the bottom of the pan! Stir every 30 s - 1 min or so until thickened and reached the soft-ball stage
4) Take off the heat and leave to cool for five minutes before starting to beat as described. Then add the chocolate and allow to melt from the remaining heat of the fudge. Keep beating until almost crumbly and then press into a mould or flatten on a baking sheet
*CLEANING UP TIP*
I know what you're thinking, all that sugary mess, it's going to take a lot of scrubbing to clean up... not so! A very easy way to clean up after making any kid of sugary caramel, toffee or fudge, just leave the pan/spoon/whatever implement you used in the sink submerged in water for half an hour (or longer) and the sugar will simply dissolve in the water over time, and you can just pour it away before giving your dishes a quick rinse. Easy as pie!
No comments:
Post a Comment
What do you think of this recipe?